Skip to content
Tauri HTTP 请求开发
大家好,我是徐徐。今天的主题是如何在 Tauri 中发起 HTTP 请求。
前言
前面铺垫了很多,但是我们一直都是在整个应用的架构层面做一些设计和开发,我们现在更近一步,集成 HTTP 支持,这意味着你的桌面应用现在可以与远程服务器通信了!
安装依赖
其实要集成 HTTP 是非常简单的,Tauri 生态里面有现成工具包,当然你可以 axios 这类请求包都行,但是需要注意适配器的问题,打包后有可能会有无法使用的问题。
我这里推荐使用 Tauri 生态里面有现成工具包,但是这个包也有个缺点,就是在浏览器控制台中是无法看到请求的,因为他是 Tauri 里面的 rust 去帮我们调用请求从而绕过了 webview2 前端框架,不过这个是官网推荐的包,在解决方案这块是有保障的,不会出现一些奇奇怪怪的问题。
txt
npm install -D @tauri-apps/api修改配置
依赖安装完了,其实还不能完全随心所欲的发起请求,我们需要修改一些配置。本质上,你是在告诉 Tauri允许向特定域名发起 HTTP 和 HTTPS 请求。这对于让你的桌面应用访问指定的API至关重要,你可以从允许向localhost 发起 HTTP 请求开始测试,下面是一个简单的配置例子。
- src-tauri/tauri.conf.json
txt
{
 //..
  "tauri": {
    "allowlist": {
      "http": {
        "all": true,
        "request": true,
        "scope": [
          "http://localhost/*",
          "http://jsonplaceholder.typicode.com/*"
        ]
      }
    },
  }
  // ...
}
请求类编码实现
这里的编码就是封装一个简单的 httpClient,然后在各个地方引用,跟常规的前端请求封装没有特别大的差别。 下面是简单的封装。
- src/http/client.ts
typescript
import { fetch, FetchOptions, Response } from "@tauri-apps/api/http";


interface RequestInterceptor {
  onRequest(config: FetchOptions): FetchOptions | Promise<FetchOptions>;
}

interface ResponseInterceptor {
  onResponse<T>(response: Response<T>): Response<T> | Promise<Response<T>>;
  onError(error: Error): void | Promise<void>;
}

class HttpClient {
  private baseURL: string = '';
  private requestInterceptors: RequestInterceptor[] = [];
  private responseInterceptors: ResponseInterceptor[] = [];

  private constructor() {}

  private static instance: HttpClient;

  static getInstance(): HttpClient {
    if (!HttpClient.instance) {
      HttpClient.instance = new HttpClient();
    }
    return HttpClient.instance;
  }

  setBaseURL(baseURL: string): void {
    this.baseURL = baseURL;
  }

  addRequestInterceptor(interceptor: RequestInterceptor): void {
    this.requestInterceptors.push(interceptor);
  }

  addResponseInterceptor(interceptor: ResponseInterceptor): void {
    this.responseInterceptors.push(interceptor);
  }

  private async executeRequestInterceptors(config: FetchOptions): Promise<FetchOptions> {
    for (const interceptor of this.requestInterceptors) {
      config = await interceptor.onRequest(config);
    }
    return config;
  }

  private async executeResponseInterceptors<T>(response: Response<T>): Promise<Response<T>> {
    for (const interceptor of this.responseInterceptors) {
      response = await interceptor.onResponse(response);
    }
    return response;
  }

  private async executeErrorInterceptors(error: Error): Promise<void> {
    for (const interceptor of this.responseInterceptors) {
      await interceptor.onError(error);
    }
  }

  async request<T>(url: string, options: FetchOptions): Promise<T> {
    const config = await this.executeRequestInterceptors(options);

    try {
      const response = await fetch<T>(this.baseURL + url, config);
      const processedResponse = await this.executeResponseInterceptors(response);
      return processedResponse.data;
    } catch (error) {
      await this.executeErrorInterceptors(error as Error);
      throw error;
    }
  }
}

const httpClient = HttpClient.getInstance();
export default httpClient;
封装一个 HTTP 请求类,添加常规的配置,拦截器,响应器这些,然后再抽离一层出来,供外部使用。
- src/http/index.ts
typescript
import httpClient from './client';
import { FetchOptions, Response, ResponseType,Body } from "@tauri-apps/api/http";

httpClient.setBaseURL('http://jsonplaceholder.typicode.com');

httpClient.addRequestInterceptor({
  onRequest(config: FetchOptions): FetchOptions {
    config.headers = {
      ...config.headers,
    };
    return config;
  }
});

httpClient.addResponseInterceptor({
  onResponse<T>(response: Response<T>): Response<T> {
    if (!response.ok) {
      throw new Error(`HTTP error! status: ${response.status}`);
    }
    return response;
  },
  onError(error: Error): void {
    console.error('HTTP request error:', error);
    throw error;
  }
});

const get = async <T>(url: string) => {
  return httpClient.request<T>(url, { method: 'GET', responseType: ResponseType.JSON })
}
const post = async <T>(url: string,data:Record<string, unknown>) => {
  return httpClient.request<T>(url, { method: 'POST', body:Body.json(data), responseType: ResponseType.JSON })
}

export default {
  get,
  post
}
上面的代码主要是设置请求和相应拦截,然后封装了简单的 get 和 post 请求。
在页面中使用
tsx
import { useState } from "react"
import { Button, Card } from "@douyinfe/semi-ui"
import http from "@/http"


const Http = () => {

  const [getResponse, setGetResponse] = useState<string>('')
  const [postResponse,setPostResponse] = useState<string>('')
  const getFetchTest = () => {
    http.get("/posts/2").then(res => {
      setGetResponse(JSON.stringify(res))
    })
  }

  const postFetchTest = () => {
    http.post("/posts",{
      "id":1,
      "title":"foo",
      "body":"bar",
    }).then(res => {
      setPostResponse(JSON.stringify(res))
    })
  }

  return (
    <div>
      <Button onClick={getFetchTest}>发起Get请求测试</Button>
      <Card title="Get请求测试返回数据" style={{marginTop:10}}>
        {getResponse}
      </Card>
      <div style={{marginTop:20}}>
        <Button onClick={postFetchTest}>发起Post请求测试</Button>
        <Card title="Post请求测试返回数据" style={{marginTop:10}}>
          {postResponse}
        </Card>
      </div>

    </div>
  )
}

export default Http
非常简单的页面,到这里,在 Tauri 中进行 HTTP 请求的功能就实现了。 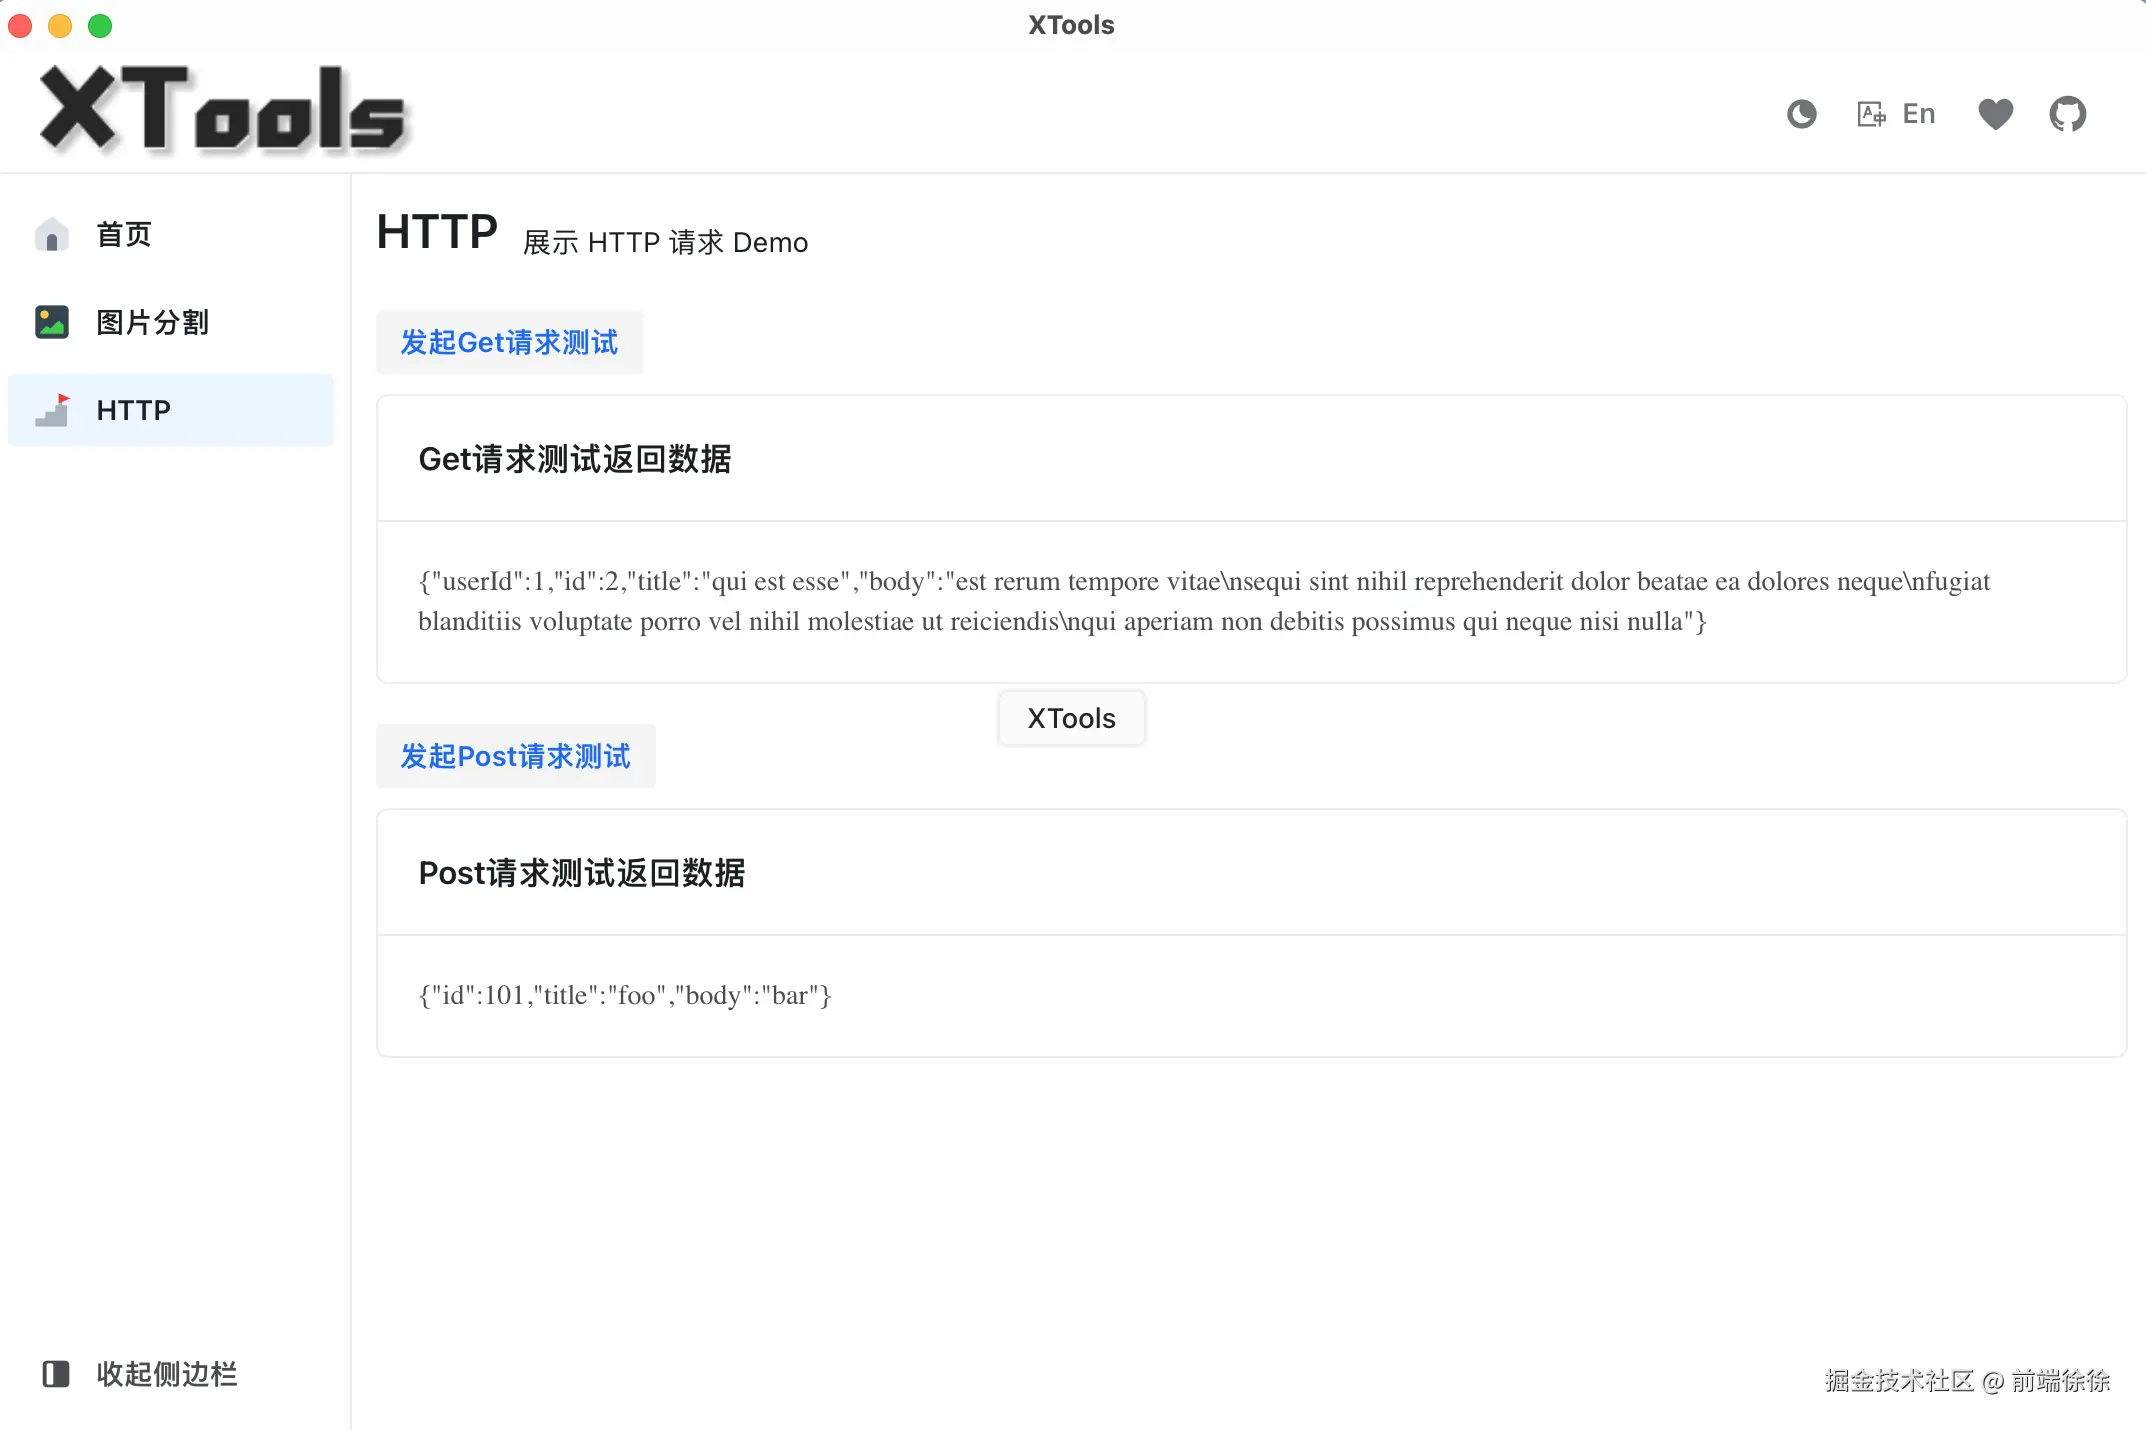
源码地址
https://github.com/Xutaotaotao/XTools/tree/feature-http
结语
这篇教程只是简单地在实现了 Tauri 中进行 HTTP 请求的功能,但是有了这个功能之后就可以做很多事情了,桌面端应用也充满了生机。如果大家有任何 Tauri 相关的问题,欢迎和我讨论。